Call 317-634-5258 for a LMC Mix Design for LMC Specifications
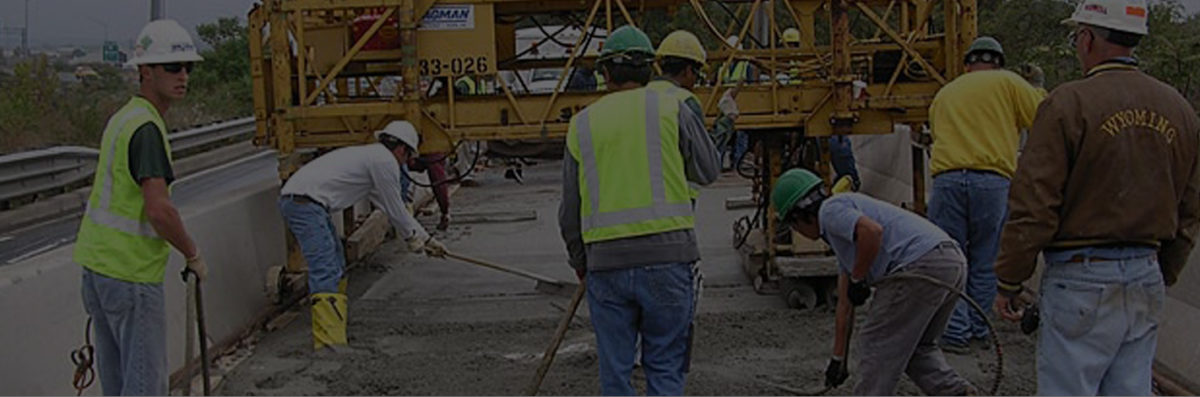
Installation of a Latex Modified Concrete Overlay on a Bridge Deck
How do we achieve a good quality LMC Project?
By being prepared and communicating before hand the essential parts of a LMC Overlay Project that is critical to its success.
What are the essential parts of a LMC overlay?
1. Fulfilling mix and specification requirements for the LMC
2. Superior bridge deck preparation
3. Superior installation of the LMC
4. Excellent curing of the LMC
1. Fulfilling Mix & Spec Requirements
a. Charging and calibration of the mobile mixers as it pertains to the specifications.
b. Provide approved DOT mix design and materials.
Components of the LMC mix:
Type I, III or Rapid Set Cement (7 Bags) 658 lbs / cubic yard
Latex Emulsion (BASF 1186 or Dow Mod A) 24.5 gal / cubic yard
Water 17.5 gal / cubic yard
Fine Aggregates (Sand) 1450 – 1785 lbs / cubic yard
Course Aggregates (Stone) 1060 – 1456 lbs / cubic yard (50%-60% Sand by total weight)
c. Field testing for slump, air and yield requirements.
d. Less than .40 – .42 (for Type I, III, and for rapid set or very early strength) water cement ratios.
e. Protect aggregate stockpiles from over-saturation by covering with plastic to assure uniform moisture and slumps at least two days prior to use.
By fulfilling the mix and specification requirements for LMC, a quality product will always be produced!
2. Bridge Deck Surface Preparation
a. Scarification of bridge deck. Remove existing overlays plus ½” min. existing deck.
b. Sounding for bad concrete.
c. Removal of deteriorated/unsound concrete – total surface hydrodemolition is the preferred method for longest lasting LMC overlays.
d. Thoroughly clean the bridge deck surface by sand-blasting, shot-blasting and / or water-blasting (5,000 PSI minimum preferred method after hydrodemolition) – the entire deck, curb line, new concrete, joints, deck drains and surfaces the new overlay will contact. Expose fine and coarse aggregate on new concrete surfaces.
e. Dry-run of finish machine making sure it is set to proper operation and profile.
f. Pre-soak burlap and allow to drain prior to placement. New burlap will need to soak for several days.
g. Investigate bridge deck for any irregularities; no bond-breakers (paint, oil, dirt, etc.), cracks, unsound concrete, reinforcing steel is not dislodged, longitudinal joint is sound, prior to wet down.
h. Wet down deck with potable water 1 hour prior to pour or as many as 6 hours if needed too cool the deck temperature in hot weather. No deck evaporation should be occurring during placement of LMC. Do not allow deck to dry out! Must have adequate potable water supply.
i. Remove all standing water from deck surface prior to starting overlay and have the capacity to remove any standing water in depressions with vacuum or oil-free compressed air during pour.
j. Cover deck with plastic to keep clean and to prevent evaporation from occurring.
k. Provide enough people and equipment to do the job right.
Through proper bridge deck surface preparation – superior bonding of the overlay will occur – this will lead to the longest lasting Latex Modified Concrete overlays.
3. Installation of LMC Overlay
a. Be conscious of weather conditions – avoid hot, dry, windy weather. Utilize night pours or early AM pours.
b. Mix is “right” — slump, air and yield.
c. Have brooms available to provide a good thick gray/green Latex Paste on the deck surface of a scarified deck. Not necessary for a hydrodemolition prepared surface. Remove all standing water on deck. Keep all water away from mix by vacuum.
d. Removal of aggregate that has lost latex paste from the deck area.
e. Place variable depth patches and uniform depth overlay in one operation on a hydrodemolition prepared surface.
f. Finish machine set properly and vibrator working to consolidate mix. Work quickly during placement.
g. Good vibration of LMC especially along curbs, joints, deep areas and end dams — use small spud vibrator.
h. Check depth of overlay periodically throughout the pour.
i. Tining (or mechanical grooving after cure).
j. Keep wet burlap (non-dripping) within 20-30 feet of finishing operation and place white plastic over burlap as soon there after as possible. Misting the burlap with a pressure washer prior to placing white plastic is suggested.
k. In hot weather, soaker hoses are highly recommended to reduce chances of cracks occurring by keeping the overlay cool under the white plastic.
A proper installation of a LMC overlay will ensure a high strength bond to the existing deck and will protect the existing concrete with an impermeable (water resistant) structural layer.
4. Curing of the LMC Overlay
a. Cover freshly placed LMC overlay with wet burlap and the white polyethylene plastic to provide an evaporation barrier AS SOON AS POSSIBLE. (15 – 30 minutes max. from time of placement).
b. In hot weather, soaker hoses are needed to keep overlay cool.
c. Keep burlap continuously wet during wet cure period.
d. Cure Durations:
- Type I Cement LMC Mix 24 hours wet / 72 hours dry
- Type III Cement LMC Mix 24 hours wet / 24 hours dry
- Rapid Set LMC Mix 3 hour wet = 2,500 psi
- Proper cure of a LMC overlay is essential in providing a 25 year service life for the LMC overlay.
5. Suggested Documentation for Installation of a LMC Overlay
Document the following weather conditions prior, during and after the pour.
_______ Ambient temperature prior to the pour
_______ Ambient temperature after the pour
_______ Deck surface temperature prior to the pour
_______ Deck surface temperature near end of the pour
_______ Concrete Temperature (for each batch)
_______ Evaporation rate prior to the pour – per ACI 305R-91
_______ Evaporation rate after to the pour – per ACI 305R-91
_______ High and low daily temperatures during cure period
Document the following time frames prior, during and after the pour.
_______ Date of pour
_______ Start time of concrete placement (for each batch)
_______ Finish time of concrete placement (for each batch)
_______ Start time of wet burlap placement
_______ Finish time of wet burlap placement
_______ Start time of white polyethylene plastic placement
_______ Finish time of white polyethylene plastic placement
_______ Date and Time wet cure period ends
_______ Date and Time dry cure period ends
Other Documentation
_______ Depth checks during placement
_______ Dry run plan sheet detailing location and actual reading of depth checks
_______ Concrete test results in field
_______ Special notes
PROJECT INFORMATION
Project Number: ______________________________
County/District: ______________________________
Pour Date: ______________________________
Structure: ______________________________
Phase: ______________________________
Signed: ______________________________
Printed Name: ______________________________
Title: ______________________________
THIS INFORMATION IS SUPPLIED AS A REFERENCE COMPILED BY EXPERIENCE. IT IS NOT INTENDED TO
SUPERSEDE OR REPLACE SPECIFICATIONS OF ANY GOVERNING BODY. IT IS ONLY OFFERED IN GOOD FAITH, WITHOUT WARRANTY OR LEGAL RESPONSIBILITY OF ANY KIND.